

X-ray computed tomography (CT) is a non-destructive testing method with which the internal structures of components and materials can be imaged three-dimensionally. The underlying process is based on the different X-ray attenuation of different materials. To generate a 3D image data set, the sample is rotated step by step through 360°, whereby an X-ray projection is recorded for each position. Subsequently, these projections are assembled using reconstruction algorithms to create a 3D data set. This data set is processed using visualisation software and analysed qualitatively and quantitatively.
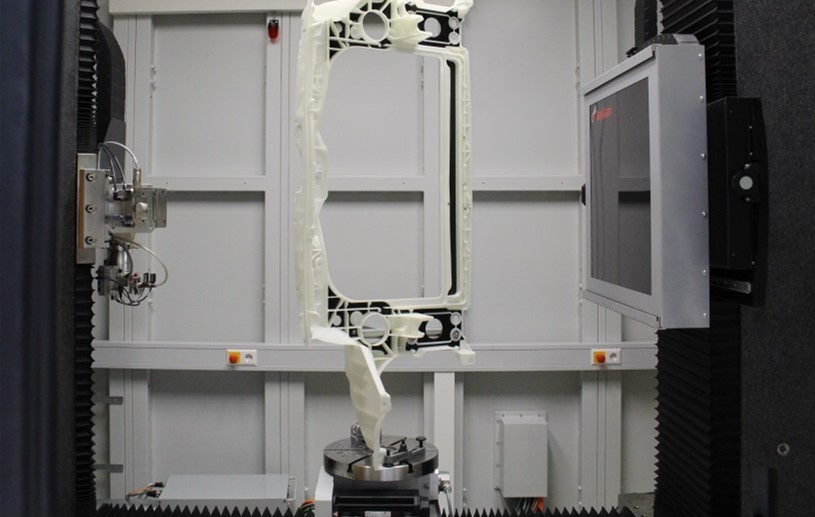
X-ray CT also enables microstructural analysis of highly stressed fibre composite structures, identifying both the fibre path and other manufacturing-related defects in the components. The X-Ray system RayScan 200E which is used at the Fraunhofer IMWS allows the examination of objects with the size of a car front-end carrier.
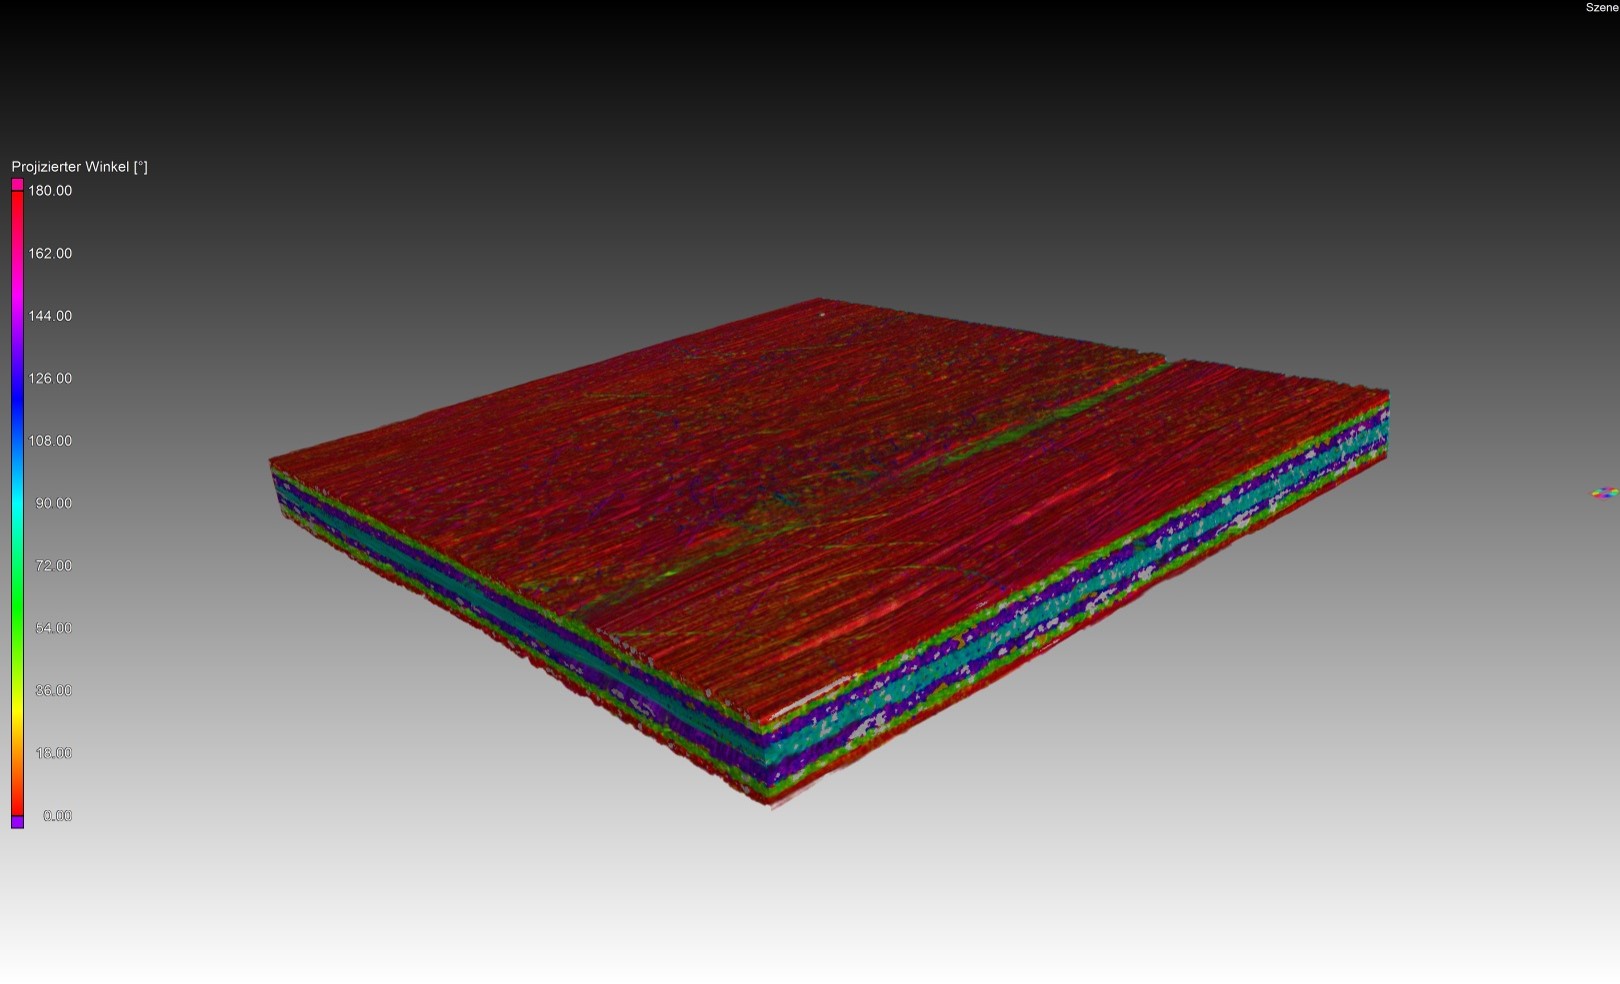
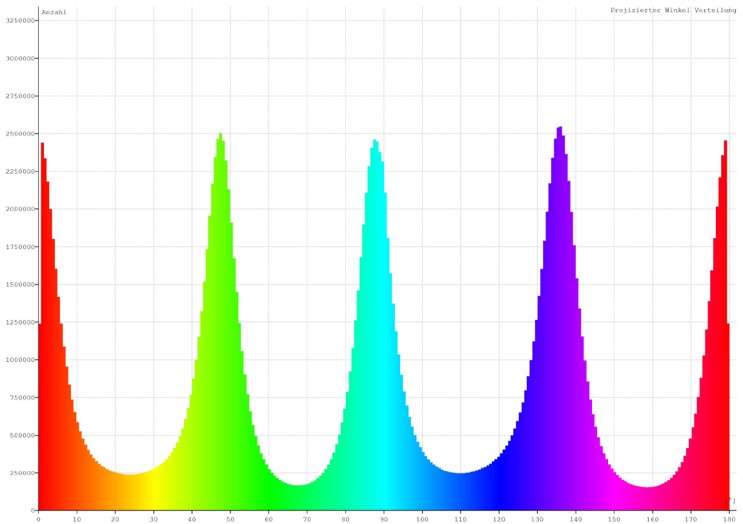
To fulfil the stiffness and strength requirements of front-end carriers in service, compliance with the specified fibre orientation, extensive freedom from pores as well as geometric dimensional accuracy and the absence of warpage are critical. The fibre orientation analysis on laminates made of UD tapes is carried out using different orientation angles (0°/+45°/-45°/90°), which are displayed with different colours. These can be plotted in a histogram according to their frequency. The local maxima represent the average fibre characteristics of the individual layers and thus provide information about the quality of the production process.
Porosity as an important quality criterion can be determined with the help of an additional module in VG-Studio. Pore size and distribution are determined and displayed in colour in the 3D model and in the histogram as a distribution function. To evaluate the quality characteristics of a component, the geometry is measured using a 3D image data set. With idealised geometric objects that are fitted to the 3D image data, it is possible to check compliance with the target geometry, such as the shape tolerances.
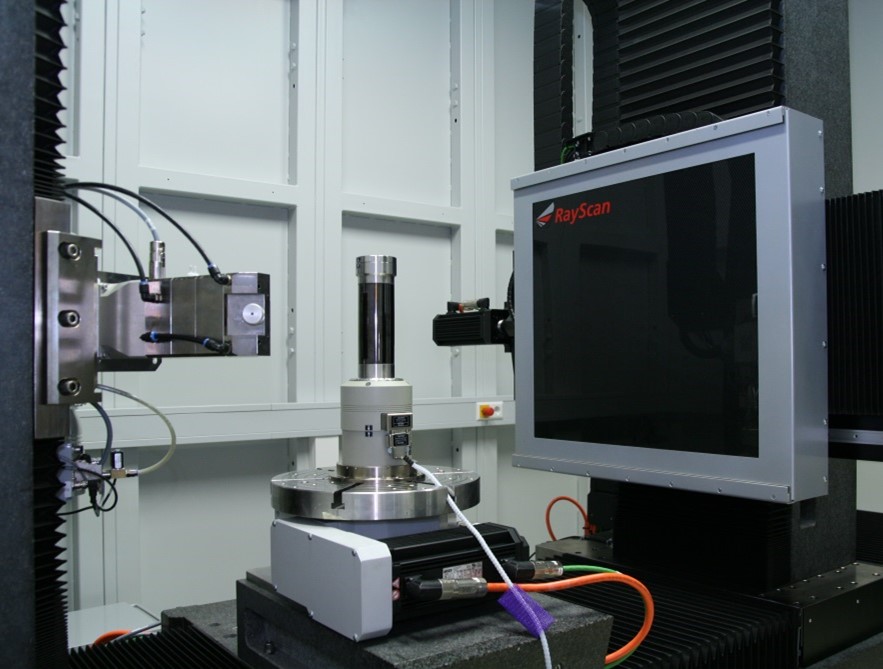
With the in-situ CT device available at the Fraunhofer IMWS, test specimens can be displayed three-dimensionally under load (tension/compression). This allows failure mechanisms to be analysed and investigated at a microstructural level. The device has a maximum force of 5 kN.
Overall, the X-ray CT system RayScan 200E in combination with the analysis methods of the Fraunhofer IMWS offers a powerful possibility for the non-destructive microstructural analysis of fibre composite structures and other materials. With its high detail detectability and wide operating mode spectrum, both manufacturing defects and structural changes under load can be detected and analysed. This enables companies in industry to gain valuable insights into the quality and safety of their products and to further develop and improve them in a targeted manner.

